There is no difference between the aperture in a film camera or in a digital camera.
The aperture is the diameter of the adjustable iris that controls the amount of light passing through the lens and onto the film plane or digital sensor. An aperture is expressed as an f-stop, which is equal to Focal_Length / Aperture_Diameter, and is written: f/number.
For example, if a lens has a focal length of 50mm - the 'normal' 35mm film camera lens - and the aperture diameter is 5mm, then the f-stop is 50/5 or f/10.
If you know what f-stop a lens is set to, you can determine the physical diameter of the aperture. For example, with an aperture of f/11:
- On a 50mm lens, the aperture is 4.55mm in diameter (50/11).
- On a 100mm lens, the aperture is 9.09mm in diameter (100/11).
- On a 20mm lens, the aperture is 1.82mm in diameter (20/11).
F-stops are used because they are a standard way to express the amount of light passing through a lens. The amount of lens passing through a 50mm lens set to an aperture of f/11 is the same as the amount of light passing through a 300mm lens set to f/11. This is far simpler than measuring the diameter of the aperture to calculate relative levels of illumination..
Tuesday, 6 January 2009

Difference between setting aperture by lens and camera
The "choice of focus" is a choice for the focus spot. With a bigger aperture (lower F number), the focus point gets more and more isolated and everything else is more and more blurred. This effect generally works better, the bigger the sensor is. That is why you don't really see this effect on point and shoot cameras; small aperture and small chip.
But that is really putting it way too simple. You will see what I mean when you get the cam and a nice bright lens.
Some lenses, especially the older ones, have an aperture ring. With most of these, you have to set the aperture on the lens; if you change it on the camera's dial it won't on the lens. With automatic lenses, which do not have an aperture ring, the number set in-camera will be electronically transmitted to the lens and then set.
Your camera has 4 "Exposure Modes" : "P" for Program, "M" for Manual, "S" for Shutter Priority and "A" for Aperture Priority.
In "P" your camera will select an aperture and shutter speed to give a correct exposure.
In "M" you can set the aperture and shutter speed any way you want.
In "S" you select a shutter speed and the camera will select a correct aperture.
In "A" you select an aperture and the camera will select a correct shutter speed.
Using "P" turns your DSLR into a glorified "point & shoot" since you have no control over the settings the camera chooses.
If you're shooting night scenes without flash then you'd use "M" so you can select both shutter speed and aperture to achieve the results you want. This requires a tripod to mount your camera on since shutter speeds are usually long - 2 seconds or more.
If you're shooting action - kids running and playing, sports or other fast moving subjects - then you'd choose "S" so you can keep the shutter speed high enough to stop the action.
If you're shooting nature or scenics you'd choose "A" since you'll want to control your aperture to give more or less Depth of Field (DOF)*. You must remember to check the shutter speed the camera selects to make sure it isn't too slow to hand-hold the camera.
A company called "The Magic Lantern" offers an instructional DVD for your camera. You should be able to find it at Circuit City or Amazon. It would, IMO, be very helpful.
Actual classes in photography would be the very best way to learn if any are available.
You might want to visit http://www.fotosharp.com and buy their "Day & Night Exposure Guide" if you plan on doing low-light, non-flash photography.
* DOF is loosely defined as the area in acceptable focus in front of and behind your subject. If you google "depth of field" you'll find numerous examples and discussions. If you go to http://www.expoimaging.net you can read about their ExpoAperture2. This is a circular chart showing the DOF for different focal lengths, apertures and sensor sizes.
But that is really putting it way too simple. You will see what I mean when you get the cam and a nice bright lens.
Some lenses, especially the older ones, have an aperture ring. With most of these, you have to set the aperture on the lens; if you change it on the camera's dial it won't on the lens. With automatic lenses, which do not have an aperture ring, the number set in-camera will be electronically transmitted to the lens and then set.
Your camera has 4 "Exposure Modes" : "P" for Program, "M" for Manual, "S" for Shutter Priority and "A" for Aperture Priority.
In "P" your camera will select an aperture and shutter speed to give a correct exposure.
In "M" you can set the aperture and shutter speed any way you want.
In "S" you select a shutter speed and the camera will select a correct aperture.
In "A" you select an aperture and the camera will select a correct shutter speed.
Using "P" turns your DSLR into a glorified "point & shoot" since you have no control over the settings the camera chooses.
If you're shooting night scenes without flash then you'd use "M" so you can select both shutter speed and aperture to achieve the results you want. This requires a tripod to mount your camera on since shutter speeds are usually long - 2 seconds or more.
If you're shooting action - kids running and playing, sports or other fast moving subjects - then you'd choose "S" so you can keep the shutter speed high enough to stop the action.
If you're shooting nature or scenics you'd choose "A" since you'll want to control your aperture to give more or less Depth of Field (DOF)*. You must remember to check the shutter speed the camera selects to make sure it isn't too slow to hand-hold the camera.
A company called "The Magic Lantern" offers an instructional DVD for your camera. You should be able to find it at Circuit City or Amazon. It would, IMO, be very helpful.
Actual classes in photography would be the very best way to learn if any are available.
You might want to visit http://www.fotosharp.com and buy their "Day & Night Exposure Guide" if you plan on doing low-light, non-flash photography.
* DOF is loosely defined as the area in acceptable focus in front of and behind your subject. If you google "depth of field" you'll find numerous examples and discussions. If you go to http://www.expoimaging.net you can read about their ExpoAperture2. This is a circular chart showing the DOF for different focal lengths, apertures and sensor sizes.
There is no difference between the aperture in a film camera or in a digital camera. The aperture is the diameter of the adjustable iris that controls the amount of light passing through the lens and onto the film plane or digital sensor. An aperture is expressed as an f-stop, which is equal to Focal_Length / Aperture_Diameter, and is written: f/number. For example, if a lens has a focal length of 50mm - the 'normal' 35mm film camera lens - and the aperture diameter is 5mm, then the f-stop is 50/5 or f/10. If you know what f-stop a lens is set to, you can determine the physical diameter of the aperture. For example, with an aperture of f/11: - On a 50mm lens, the aperture is 4.55mm in diameter (50/11). - On a 100mm lens, the aperture is 9.09mm in diameter (100/11). - On a 20mm lens, the aperture is 1.82mm in diameter (20/11). F-stops are used because they are a standard way to express the amount of light passing through a lens. The amount of lens passing through a 50mm lens set to an aperture of f/11 is the same as the amount of light passing through a 300mm lens set to f/11. This is far simpler than measuring the diameter of the aperture to calculate relative levels of illumination.. |
| |
Saturday, 3 January 2009
Lens Guide
Quick GUIDE for buying Lens....CLICK HERE..
How big an aperture do I need? Do I need IS?
Bigger apertures are better, but they cost you a lot of extra money. Why do you need a bigger aperture anyways? There are several reasons for wanting a big aperture.
Bigger apertures are most commonly used in situations where there’s poor lighting and if you cannot use flash. To take a picture, the camera will either need a bigger aperture or it will need to make the shutter speed slower to expose the shot properly. Using a larger ISO value (1600, 3200) will help too, but going too high may sometimes introduce unwanted noise into the picture. If you are handholding the shot in this situation, the need for a bigger aperture is that much more important because a slower shutter speed will lead to camera shake and blurriness.
You will also need a bigger aperture when you want to blur the background in a shot. When you use a larger aperture, the depth of field becomes shallow, placing only closer things (to the focus point) in focus, leaving the rest out of focus, or blurred. Conversely, when you use a smaller aperture, the depth of field becomes deeper, making a larger part of the image in focus.
What apertures do I need?
If you are doing available-light indoor photography, f/2.8 is the bare minimum. I recommend f/2.0 or larger.
If you are doing indoor sports or action photography, f/2.0 and larger is virtually required, so you can get fast shutter speeds to freeze the action in addition to bumping up the ISO to 800 or 1600.
If you are working in decent light (i.e. outdoors), f/4 will work just fine. If you work mostly outdoors in great lighting, f/5.6 and above will suffice. If you plan on bringing a monopod or a tripod to stabilize things, you can even get away with even smaller apertures.
V. What is an extender?

An extender is a special kind of lens which mounts itself between the main lens and your camera. As its name suggests, an extender increases the focal length of your lens by some set amount. At this moment, there are two kinds of extenders, 1.4x and 2.0x. As a quick example, if you have a 100mm lens, the 1.4x and 2.0x extenders will transform the focal length into 140mm and 200mm respectively.
For this reason alone, extenders can be quite useful in extending the reach of your lenses at a relatively low cost while taking less space.
As always though, there's a tradeoff when you gain convenience. You sacrifice image quality, and the lens becomes "slower." Here's an explanation for both points.
1) You might recall that f-stop is a simple ratio between the diameter of the aperture of the lens (how big the hole is) and the focal length of the lens. For example, a 50mm lens with a 25mm diameter has an f-stop value of 2, hence the f/2 branding. Naturally, this means then that doubling the focal length will double the f-stop value, causing you to lose TWO whole stops. Using a 1.4x extender makes you lose ONE stop. If the f-stop value gets too high, sometimes auto focus will no longer function. Check with your manufacturer for exact details.
2) Extenders also degrade image quality, especially if you use a 2x extender. Think of an extender as a magnifying glass for a moment. If an extender is a magnifying glass, all of the "faults" in a lens will effectively become that much more noticeable. For examples, images may be softer, be more distorted or may lack contrast. But this is the price you pay for convenience. I'm sure that most of us would be happy lugging around a 200mm lens with an extender rather than a 400mm lens and a tripod.
To sum it up, extenders are useful tools for getting more utility out of your lens collection. I personally recommend buying a 1.4x converter as the degradation in speed and image quality is less noticeable in practice. If you start with a very good lens, you may not notice a difference at all!
Lens Recommendations
These recommendations are geared towards a budget-minded DSLR buyer. I've also included some nicer lenses that are popular choices for those who've outgrown kit lenses and wish to upgrade.
The prevailing theme is: Less is more. Spend your money on fewer lenses rather than spreading your money out. It's better to acquire lenses slowly but steadily. Buy one lens at a time and evaluate your needs. Never buy a lens for the sake of buying a lens!
Disclaimer: Prices are estimates taken from Amazon.com as of the time of this post. I do NOT count rebates in the price, so please check with your preferred merchant before buying.
A) Starting Out?
------------------------------------------------------------------------------
The following 4 setups are the among the most common starting kits I've come across.
Setup A ($250 and up) - Single Convenience Lens

Recommended for those who want one lens to handle it all. These are perfect lenses for traveling when portability is a concern. These lenses compromise some quality because of the large range, but the upside is that you can figure out what focal lengths you use the most and work from there.
Sigma 18-125mm f/3.5-5.6 ($250)
Cheap and good price-performance. A great traveling lens.
Sigma 18-200mm OS f/3.5-6.3 ($450)
A solid and versatile lens for non-Nikon users.
Nikon 18-200mm VR f/3.5-5.6 ($680)
The current king of convenience lenses. It's not flawless, so make sure you try this lens out before you buy.
Setup B ($300 and up) - Single "Walkaround" Lens

A walkaround lens is another name for standard zoom lens. These lenses are faster and better in optical quality than convenience lenses, but they lose range and portability. They also cost more.
Sigma 17-70mm f/2.8-4.5 ($350)
A solid replacement for a kit lens.Great optical quality (sharp!) and fairly fast.
Tamron 17-50mm f/2.8 ($450)
This Tamron lens is widely regarded as the cream of the crop for third party lenses. Highly recommended if you are after a constant aperture zoom lens.
Setup C (add $80) - "Walkaround Lens" + Prime

Pair any of the lenses above with the 50mm f/1.8 prime. The prime is ideal for portraits, available-light photography and more.
Setup D ($700 and up) - Prosumer Lenses

For those who want something more than the entry level. These lenses aren't cheap, but they are lasting investments that will serve you well.
Canon 17-40mm f/4 L ($700)
A popular choice for those who want to splurge on a quality wide-angle lens with top-notch build quality and autofocus. As good as this is, consider the EF-S 17-55 if you are not using a full-frame body.
Canon 70-200mm f/4 L ($600)
Arguably Canon's most popular lens. It's one of the best zoom lenses on the market (optically speaking) and comes at a moderate price. If f/4 is OK for you, look no further. The IS version costs $1100.
Canon 17-55mm f/2.8 IS ($1000)
The best of the best when it comes to a standard zoom lens. L-class optical quality, L-class autofocus and an L-class price to boot. Alas, build quality is a bit weak relative to the price point, but this is the best lens for an APS-C body at the moment.
Canon 24-105mm f/4 IS ($1100)
A convenient standard zoom lens at a premium price. The focal length is a little awkward to use on an APS-C body, but if it fits your needs better than the 17-55, it's a good choice.
B) Convenience Lenses
------------------------------------------------------------------------------
The rest of this guide splits up lenses into various categories. This category contains compact, super-convenient lenses which are good for outdoor shots and for budget-minded photographers.
Sigma 18-125mm f/3.5-5.6 ($250) – It's not without its flaws, but it's a convenient starter lens and also good for vacations. For $100 more, you can get the 18-200, a similar lens with longer reach. For $100 more, you can add image stabilization to either lens.
Canon EF-S 17-85mm f/4-5.6 IS ($550) - A popular alternative to the kit lens. It has its flaws, but it's a convenient lens for traveling and general use.
Nikon 18-200mm f/3.5-5.6 VR DX ($680) - This is a very good lens relative to other "convenience lenses," but it still has its shortcomings. Try before you buy.
C) Walkaround Lenses
------------------------------------------------------------------------------
If you want a wide or standard zoom lens, put these at the top of your list. These are less versatile than the do-it-all lenses, but they are faster and have better optics.
Sigma 17-70mm f/2.8-4.5 ($350) - An excellent alternative to a kit lens at a slightly higher price. This lens is sharp throughout its range and roughly replicates a classic 28-105 lens.
Tamron 17-50mm f/2.8 ($450) - A spectacular lens for APS-C cameras. If you're in the market for a quality standard zoom with a fixed aperture but can't splurge on the Canon 17-55 IS, this is the one to get.
Canon 17-40mm f/4 L ($700) – Arguably Canon's most popular lens, this great wide-angle walkaround lens can be used everywhere as long as the lighting is good. While third party alternatives are budget friendly, the Canon still trumps them in focus speed/accuracy and build quality.
Canon/Nikon 28-105mm f/3.5-4.5 ($230) - One of the best bargains out there and is easily one of the best consumer zooms available. It beats a kit lens by a long shot, but it's less convenient due to the crop factor. Do not confuse with the f/4-5.6 variations which are cheaper and far worse in quality.
D) Telephoto Zooms
------------------------------------------------------------------------------
Need that extra reach to capture distant subjects? If you are on a tight budget, I highly recommend buying a decent walkaround lens first and then dealing with telephoto later. In addition, you'll learn how to use the camera and be able to better evaluate your situation when the time comes to buy your second lens.
There are lots of choices, but my top recommendations are the Sigma 70-300 APO for budget users, the 70-200 f/4 L for discerning users, and the Canon 70-300 IS for everybody else.
APS-C Telephoto Zooms
Sigma 50-150mm f/2.8 EX ($600) – A compact and economical alternative to a classic 70-200 lens for APS-C cameras. Optically sound, but early adopters are reporting front focusing issues. Try before you buy.
Tokina 50-135mm f/2.8 EX ($700) – A similar lens to the Sigma, without the front focusing issues but with a reduced range.
Up to 200mm
Canon 70-200mm f/4 L ($600) - An entry-level L lens which is a big leap up from consumer telephoto lenses. Stunning optical quality as long as you aren't taking low light shots. Lightweight and compact enough to bring everywhere. One common use of this lens is for zoo/short-range wildlife photography.
Nikon 55-200mm f/4.5-5.6 VR ($250) - A cheap telephoto kit lens that has image stabilization. Recommended for those starting out. Don't expect much, but having VR at this price is a boon. Canon has a similar lens (55-250 IS).
300mm+
Sigma 70-300mm f/4-5.6 APO DG ($200) - If you need a telephoto lens and only have $200 to spend, this is the lens to buy. Be sure to buy the APO version.
Canon 70-300mm f/4-5.6 IS ($550) - Canon has replaced its popular 75-300 IS with a brand new version that contains a UD element, an updated IS mechanism and an updated body. This is a much sharper and better lens than the old version. Some consider it to be close to the 70-200/4 L mentioned above.
Nikon 70-300mm f/4.5-5.6 VR ($530) - Similar to the Canon lens, with some of the same strengths and flaws.
Worth a Mention (Good but flawed choices)
Sigma 70-200mm f/2.8 EX DG ($750) – An alternative to the first party offerings for hundreds less, IF you get a good copy. Be sure that your merchant accepts exchanges, or be ready to send to Sigma for calibration. I'm only including this here because it's a nice lens when it works properly.
Tamron 70-200mm f/2.8 ($700) – A cheap and fairly lightweight alternative to first party offerings. Optically equivalent to first party offerings, but early reviews and user reports find that autofocus speed and accuracy are disappointing. Try before you buy.
E) Ultra Wide Zooms
------------------------------------------------------------------------------
With the advent of digital bodies with a crop factor came the need for ultra-wide lenses to make up for lost coverage at the wide end. Consequently, almost all of these lenses are only suitable for such bodies and if used on a full-frame camera, will exhibit vignetting. In general, there are a lot of ultra-wide lenses on the market, and most of them are pretty good. The first party offerings are better, but like always, they may not be worth twice the price.
What may sway your decision most (besides price) may be how each lens fits into your current lens lineup. Because each one starts and stops at different focal lengths, what works for one person may not work for you.
Canon EF-S 10-22mm f/3.5-4.5 ($700) – This is a sharp, relatively distortion-free (for this focal length) lens that has L-class optics. Don't be misled by the f/3.5-4.5 designation. It's f/3.5 up to 20mm and f/4.5 for the last 2mm.
Tokina 12-24mm f/4 ATX-PRO ($470) – This lens is a great alternative to first party ultra wide lenses. Build quality is superb, and the image quality is similar. The newly released 11-16/2.8 is even better.
The other good third party lens to look at is the Sigma 10-20mm f/4-5.6 EX ($470). It's not perfect, but it's similar to the Tokina. I would avoid the Tamron 11-18 which is more expensive and has more faults than the Tokina and Sigma. Nikon has a similar lens that is similar to the Canon and Tokina, but it's priced close to $1000, putting it out of range for most.
F) Primes
------------------------------------------------------------------------------
Primes are the best bangs for the buck if you need them. You lose flexibility, but you gain it all back in sharpness (especially wide-open), low distortion, less lens flare, and less ghosting.
Do you shoot indoor sports like hockey or indoor action? Do you shoot indoors in low-light in places where flash is prohibited? If you work in these kinds of tricky conditions, consider these lenses. Primes are also superb for portraits though high grade zooms also do the trick.
I am only listing shorter primes (less than 200mm) here.
50mm f/1.8 (< $100) – Should be part of everybody’s collection. If you use this prime a lot and you own a Canon body, step up to the f/1.4 version for the better build quality and better optics.
85mm f/1.8 ($360) – An ideal lens for candids and portraits. Also works as a short range telephoto lens in low light. Canon offers a similar 100mm f/2 lens for a little more if 85mm is too short for you.
Canon 135mm f/2 L ($900) – This is one of Canon’s best lenses. This gem will serve you extremely well if you shoot indoor sports or concerts. It's also a superb portrait lens. Nikon has a similar lens, but it costs more.
Canon 200mm f/2.8 L ($700) - This lens is very similar in quality and size to the 135 and is a great, compact alternative to a 70-200 f/2.8 zoom which is heavy and attention grabbing.
You may notice that I have not listed any wide primes here. Generally speaking, consumer-grade wide primes aren't a whole lot better than quality wide zooms. You are better off buying a quality zoom instead.
G) Macro Lenses
------------------------------------------------------------------------------
In a gist, macro lenses let you get closer to your subject than a normal lens can, effectively letting you fill up the frame with a small subject. This is how small subjects like bees and flowers can appear "magnified." Macro lenses can also double as standard lenses. The downside? They tend to have higher f-stop numbers than an equivalent lens, and they also tend to hunt a bit in low light.
Sigma 50mm f/2.8 EX Macro ($230) – A good bang for the buck. This lens renders life size images (1:1) as opposed to the Canon model which only has 0.5x magnification (1:2).
Canon EF-S 60mm f/2.8 Macro ($370) - Although it's an EF-S lens, this is a spectacular macro lens made to replicate a classic 100mm macro lens. Sharpness is top notch. Great for product photography. I personally use it for taking pictures of food.
Tamron 90mm f/2.8 Macro ($400) – Popular telephoto macro. The Canon/Nikon 100mm versions are better (particularly in focusing) but cost more. The Sigma 105mm f/2.8 EX ($350) is also very similar to the Tamron.
Sigma 180mm f/2.8 EX APO Macro HSM ($650) - Sharpness is undeniably good though focusing speed is lacking compared to first party choices. Sigma also makes a popular 150mm macro lens if 180mm is a bit too long.
How big an aperture do I need? Do I need IS?
Bigger apertures are better, but they cost you a lot of extra money. Why do you need a bigger aperture anyways? There are several reasons for wanting a big aperture.
Bigger apertures are most commonly used in situations where there’s poor lighting and if you cannot use flash. To take a picture, the camera will either need a bigger aperture or it will need to make the shutter speed slower to expose the shot properly. Using a larger ISO value (1600, 3200) will help too, but going too high may sometimes introduce unwanted noise into the picture. If you are handholding the shot in this situation, the need for a bigger aperture is that much more important because a slower shutter speed will lead to camera shake and blurriness.
You will also need a bigger aperture when you want to blur the background in a shot. When you use a larger aperture, the depth of field becomes shallow, placing only closer things (to the focus point) in focus, leaving the rest out of focus, or blurred. Conversely, when you use a smaller aperture, the depth of field becomes deeper, making a larger part of the image in focus.
What apertures do I need?
If you are doing available-light indoor photography, f/2.8 is the bare minimum. I recommend f/2.0 or larger.
If you are doing indoor sports or action photography, f/2.0 and larger is virtually required, so you can get fast shutter speeds to freeze the action in addition to bumping up the ISO to 800 or 1600.
If you are working in decent light (i.e. outdoors), f/4 will work just fine. If you work mostly outdoors in great lighting, f/5.6 and above will suffice. If you plan on bringing a monopod or a tripod to stabilize things, you can even get away with even smaller apertures.
V. What is an extender?
An extender is a special kind of lens which mounts itself between the main lens and your camera. As its name suggests, an extender increases the focal length of your lens by some set amount. At this moment, there are two kinds of extenders, 1.4x and 2.0x. As a quick example, if you have a 100mm lens, the 1.4x and 2.0x extenders will transform the focal length into 140mm and 200mm respectively.
For this reason alone, extenders can be quite useful in extending the reach of your lenses at a relatively low cost while taking less space.
As always though, there's a tradeoff when you gain convenience. You sacrifice image quality, and the lens becomes "slower." Here's an explanation for both points.
1) You might recall that f-stop is a simple ratio between the diameter of the aperture of the lens (how big the hole is) and the focal length of the lens. For example, a 50mm lens with a 25mm diameter has an f-stop value of 2, hence the f/2 branding. Naturally, this means then that doubling the focal length will double the f-stop value, causing you to lose TWO whole stops. Using a 1.4x extender makes you lose ONE stop. If the f-stop value gets too high, sometimes auto focus will no longer function. Check with your manufacturer for exact details.
2) Extenders also degrade image quality, especially if you use a 2x extender. Think of an extender as a magnifying glass for a moment. If an extender is a magnifying glass, all of the "faults" in a lens will effectively become that much more noticeable. For examples, images may be softer, be more distorted or may lack contrast. But this is the price you pay for convenience. I'm sure that most of us would be happy lugging around a 200mm lens with an extender rather than a 400mm lens and a tripod.
To sum it up, extenders are useful tools for getting more utility out of your lens collection. I personally recommend buying a 1.4x converter as the degradation in speed and image quality is less noticeable in practice. If you start with a very good lens, you may not notice a difference at all!
Lens Recommendations
These recommendations are geared towards a budget-minded DSLR buyer. I've also included some nicer lenses that are popular choices for those who've outgrown kit lenses and wish to upgrade.
The prevailing theme is: Less is more. Spend your money on fewer lenses rather than spreading your money out. It's better to acquire lenses slowly but steadily. Buy one lens at a time and evaluate your needs. Never buy a lens for the sake of buying a lens!
Disclaimer: Prices are estimates taken from Amazon.com as of the time of this post. I do NOT count rebates in the price, so please check with your preferred merchant before buying.
A) Starting Out?
------------------------------------------------------------------------------
The following 4 setups are the among the most common starting kits I've come across.
Setup A ($250 and up) - Single Convenience Lens
Recommended for those who want one lens to handle it all. These are perfect lenses for traveling when portability is a concern. These lenses compromise some quality because of the large range, but the upside is that you can figure out what focal lengths you use the most and work from there.
Sigma 18-125mm f/3.5-5.6 ($250)
Cheap and good price-performance. A great traveling lens.
Sigma 18-200mm OS f/3.5-6.3 ($450)
A solid and versatile lens for non-Nikon users.
Nikon 18-200mm VR f/3.5-5.6 ($680)
The current king of convenience lenses. It's not flawless, so make sure you try this lens out before you buy.
Setup B ($300 and up) - Single "Walkaround" Lens
A walkaround lens is another name for standard zoom lens. These lenses are faster and better in optical quality than convenience lenses, but they lose range and portability. They also cost more.
Sigma 17-70mm f/2.8-4.5 ($350)
A solid replacement for a kit lens.Great optical quality (sharp!) and fairly fast.
Tamron 17-50mm f/2.8 ($450)
This Tamron lens is widely regarded as the cream of the crop for third party lenses. Highly recommended if you are after a constant aperture zoom lens.
Setup C (add $80) - "Walkaround Lens" + Prime
Pair any of the lenses above with the 50mm f/1.8 prime. The prime is ideal for portraits, available-light photography and more.
Setup D ($700 and up) - Prosumer Lenses
For those who want something more than the entry level. These lenses aren't cheap, but they are lasting investments that will serve you well.
Canon 17-40mm f/4 L ($700)
A popular choice for those who want to splurge on a quality wide-angle lens with top-notch build quality and autofocus. As good as this is, consider the EF-S 17-55 if you are not using a full-frame body.
Canon 70-200mm f/4 L ($600)
Arguably Canon's most popular lens. It's one of the best zoom lenses on the market (optically speaking) and comes at a moderate price. If f/4 is OK for you, look no further. The IS version costs $1100.
Canon 17-55mm f/2.8 IS ($1000)
The best of the best when it comes to a standard zoom lens. L-class optical quality, L-class autofocus and an L-class price to boot. Alas, build quality is a bit weak relative to the price point, but this is the best lens for an APS-C body at the moment.
Canon 24-105mm f/4 IS ($1100)
A convenient standard zoom lens at a premium price. The focal length is a little awkward to use on an APS-C body, but if it fits your needs better than the 17-55, it's a good choice.
B) Convenience Lenses
------------------------------------------------------------------------------
The rest of this guide splits up lenses into various categories. This category contains compact, super-convenient lenses which are good for outdoor shots and for budget-minded photographers.
Sigma 18-125mm f/3.5-5.6 ($250) – It's not without its flaws, but it's a convenient starter lens and also good for vacations. For $100 more, you can get the 18-200, a similar lens with longer reach. For $100 more, you can add image stabilization to either lens.
Canon EF-S 17-85mm f/4-5.6 IS ($550) - A popular alternative to the kit lens. It has its flaws, but it's a convenient lens for traveling and general use.
Nikon 18-200mm f/3.5-5.6 VR DX ($680) - This is a very good lens relative to other "convenience lenses," but it still has its shortcomings. Try before you buy.
C) Walkaround Lenses
------------------------------------------------------------------------------
If you want a wide or standard zoom lens, put these at the top of your list. These are less versatile than the do-it-all lenses, but they are faster and have better optics.
Sigma 17-70mm f/2.8-4.5 ($350) - An excellent alternative to a kit lens at a slightly higher price. This lens is sharp throughout its range and roughly replicates a classic 28-105 lens.
Tamron 17-50mm f/2.8 ($450) - A spectacular lens for APS-C cameras. If you're in the market for a quality standard zoom with a fixed aperture but can't splurge on the Canon 17-55 IS, this is the one to get.
Canon 17-40mm f/4 L ($700) – Arguably Canon's most popular lens, this great wide-angle walkaround lens can be used everywhere as long as the lighting is good. While third party alternatives are budget friendly, the Canon still trumps them in focus speed/accuracy and build quality.
Canon/Nikon 28-105mm f/3.5-4.5 ($230) - One of the best bargains out there and is easily one of the best consumer zooms available. It beats a kit lens by a long shot, but it's less convenient due to the crop factor. Do not confuse with the f/4-5.6 variations which are cheaper and far worse in quality.
D) Telephoto Zooms
------------------------------------------------------------------------------
Need that extra reach to capture distant subjects? If you are on a tight budget, I highly recommend buying a decent walkaround lens first and then dealing with telephoto later. In addition, you'll learn how to use the camera and be able to better evaluate your situation when the time comes to buy your second lens.
There are lots of choices, but my top recommendations are the Sigma 70-300 APO for budget users, the 70-200 f/4 L for discerning users, and the Canon 70-300 IS for everybody else.
APS-C Telephoto Zooms
Sigma 50-150mm f/2.8 EX ($600) – A compact and economical alternative to a classic 70-200 lens for APS-C cameras. Optically sound, but early adopters are reporting front focusing issues. Try before you buy.
Tokina 50-135mm f/2.8 EX ($700) – A similar lens to the Sigma, without the front focusing issues but with a reduced range.
Up to 200mm
Canon 70-200mm f/4 L ($600) - An entry-level L lens which is a big leap up from consumer telephoto lenses. Stunning optical quality as long as you aren't taking low light shots. Lightweight and compact enough to bring everywhere. One common use of this lens is for zoo/short-range wildlife photography.
Nikon 55-200mm f/4.5-5.6 VR ($250) - A cheap telephoto kit lens that has image stabilization. Recommended for those starting out. Don't expect much, but having VR at this price is a boon. Canon has a similar lens (55-250 IS).
300mm+
Sigma 70-300mm f/4-5.6 APO DG ($200) - If you need a telephoto lens and only have $200 to spend, this is the lens to buy. Be sure to buy the APO version.
Canon 70-300mm f/4-5.6 IS ($550) - Canon has replaced its popular 75-300 IS with a brand new version that contains a UD element, an updated IS mechanism and an updated body. This is a much sharper and better lens than the old version. Some consider it to be close to the 70-200/4 L mentioned above.
Nikon 70-300mm f/4.5-5.6 VR ($530) - Similar to the Canon lens, with some of the same strengths and flaws.
Worth a Mention (Good but flawed choices)
Sigma 70-200mm f/2.8 EX DG ($750) – An alternative to the first party offerings for hundreds less, IF you get a good copy. Be sure that your merchant accepts exchanges, or be ready to send to Sigma for calibration. I'm only including this here because it's a nice lens when it works properly.
Tamron 70-200mm f/2.8 ($700) – A cheap and fairly lightweight alternative to first party offerings. Optically equivalent to first party offerings, but early reviews and user reports find that autofocus speed and accuracy are disappointing. Try before you buy.
E) Ultra Wide Zooms
------------------------------------------------------------------------------
With the advent of digital bodies with a crop factor came the need for ultra-wide lenses to make up for lost coverage at the wide end. Consequently, almost all of these lenses are only suitable for such bodies and if used on a full-frame camera, will exhibit vignetting. In general, there are a lot of ultra-wide lenses on the market, and most of them are pretty good. The first party offerings are better, but like always, they may not be worth twice the price.
What may sway your decision most (besides price) may be how each lens fits into your current lens lineup. Because each one starts and stops at different focal lengths, what works for one person may not work for you.
Canon EF-S 10-22mm f/3.5-4.5 ($700) – This is a sharp, relatively distortion-free (for this focal length) lens that has L-class optics. Don't be misled by the f/3.5-4.5 designation. It's f/3.5 up to 20mm and f/4.5 for the last 2mm.
Tokina 12-24mm f/4 ATX-PRO ($470) – This lens is a great alternative to first party ultra wide lenses. Build quality is superb, and the image quality is similar. The newly released 11-16/2.8 is even better.
The other good third party lens to look at is the Sigma 10-20mm f/4-5.6 EX ($470). It's not perfect, but it's similar to the Tokina. I would avoid the Tamron 11-18 which is more expensive and has more faults than the Tokina and Sigma. Nikon has a similar lens that is similar to the Canon and Tokina, but it's priced close to $1000, putting it out of range for most.
F) Primes
------------------------------------------------------------------------------
Primes are the best bangs for the buck if you need them. You lose flexibility, but you gain it all back in sharpness (especially wide-open), low distortion, less lens flare, and less ghosting.
Do you shoot indoor sports like hockey or indoor action? Do you shoot indoors in low-light in places where flash is prohibited? If you work in these kinds of tricky conditions, consider these lenses. Primes are also superb for portraits though high grade zooms also do the trick.
I am only listing shorter primes (less than 200mm) here.
50mm f/1.8 (< $100) – Should be part of everybody’s collection. If you use this prime a lot and you own a Canon body, step up to the f/1.4 version for the better build quality and better optics.
85mm f/1.8 ($360) – An ideal lens for candids and portraits. Also works as a short range telephoto lens in low light. Canon offers a similar 100mm f/2 lens for a little more if 85mm is too short for you.
Canon 135mm f/2 L ($900) – This is one of Canon’s best lenses. This gem will serve you extremely well if you shoot indoor sports or concerts. It's also a superb portrait lens. Nikon has a similar lens, but it costs more.
Canon 200mm f/2.8 L ($700) - This lens is very similar in quality and size to the 135 and is a great, compact alternative to a 70-200 f/2.8 zoom which is heavy and attention grabbing.
You may notice that I have not listed any wide primes here. Generally speaking, consumer-grade wide primes aren't a whole lot better than quality wide zooms. You are better off buying a quality zoom instead.
G) Macro Lenses
------------------------------------------------------------------------------
In a gist, macro lenses let you get closer to your subject than a normal lens can, effectively letting you fill up the frame with a small subject. This is how small subjects like bees and flowers can appear "magnified." Macro lenses can also double as standard lenses. The downside? They tend to have higher f-stop numbers than an equivalent lens, and they also tend to hunt a bit in low light.
Sigma 50mm f/2.8 EX Macro ($230) – A good bang for the buck. This lens renders life size images (1:1) as opposed to the Canon model which only has 0.5x magnification (1:2).
Canon EF-S 60mm f/2.8 Macro ($370) - Although it's an EF-S lens, this is a spectacular macro lens made to replicate a classic 100mm macro lens. Sharpness is top notch. Great for product photography. I personally use it for taking pictures of food.
Tamron 90mm f/2.8 Macro ($400) – Popular telephoto macro. The Canon/Nikon 100mm versions are better (particularly in focusing) but cost more. The Sigma 105mm f/2.8 EX ($350) is also very similar to the Tamron.
Sigma 180mm f/2.8 EX APO Macro HSM ($650) - Sharpness is undeniably good though focusing speed is lacking compared to first party choices. Sigma also makes a popular 150mm macro lens if 180mm is a bit too long.
APO
Apochromatic - the lens focuses 3 frequencies of light
(probably Red, Green and Blue) to the focal plane.
This helps minimize color fringing.
A lesser quality lens might be Achromatic, focusing 2 frequencies to the
focal plane. You would get color fringing of the third primary color.
Note that just because a lens is Apochromatic, that doesn't say anything
about what 3 frequencies it focuses at the focal plane or anything about
the performance of any other frequencies at all. (it would be possible if
stupid to create an Apochromatic lens that focused 3 infrared frequencies
at the focal plane, but focused red, green and blue at incompatible
distances - such a lens would be totally useless for visible light
photography)
(probably Red, Green and Blue) to the focal plane.
This helps minimize color fringing.
A lesser quality lens might be Achromatic, focusing 2 frequencies to the
focal plane. You would get color fringing of the third primary color.
Note that just because a lens is Apochromatic, that doesn't say anything
about what 3 frequencies it focuses at the focal plane or anything about
the performance of any other frequencies at all. (it would be possible if
stupid to create an Apochromatic lens that focused 3 infrared frequencies
at the focal plane, but focused red, green and blue at incompatible
distances - such a lens would be totally useless for visible light
photography)
Thursday, 1 January 2009
Penjelasan mengenai Spec.

Digital Optical ( for Audio )

RGB ( Red, Green and Blue ) can use for input YPbPr Video.


Phono to Phono (for Video)

Jack to phono
Phono ( red and white) for L and R to single L/R (phono)
To better equip you for this task, here are the meanings to some of the more popular technologies out right now:
1) Dolby Digital-
Dolby digital was originally created for VHS; it’s a superior stereo sound. It is also
Referred to as Dolby digital 2.0 /2.1
2) Dolby Digital 5.1 –
This is the current surround sound standard. The 5 (in 5.1) stands for 5 full range
Speakers Left Front, right front, left rear, right rear, and center. The .1 stands for a
Subwoofer, or a speaker for low lever frequencies (1hz – 220hz)
3) DTS –
This is a rival format to Dolby digital 5.1; the main difference is that DTS has a higher
Bit rate, and therefore takes up more space on a disc (physically). Because of the
Higher bit rate, it sounds a little better. The good part is that most audio video
Receivers can do both DD 5.1 and DTS.
4) THX –
If you are going to drop some money, then get a THX certified receiver. All THX
means is that after your signal (sound) has been converted from digital to analog (so
we can hear it) there is some further processing. This certification provides a high
standard, and I have yet to hear a THX receiver that does not sound amazing. THX is
brought to you by our friends at Lucas film (the people who made star wars)
5) DTS 6.1 / Dolby Digital 6.1 matrix –
There is now a 6th channel (which is becoming the new standard ?) this is a rear
center channel. This gives a more accurate 3-D sound. A 6.1 matrix is when instead
of having a 6th channel hook up on the back of a receiver, its encoded into the two
back channels. I have never seen this hooked up
6) DTS Discrete 6.1-
Same as #5 but this time the 6th channel has its own speaker jack in the receiver, this
provides a much cleaner sound.
7) DTS, Dolby 7.1 -
Now you have seven speakers, center, two in the front, two in the rear, and two on the
side. It is only matrix right now, I have not seen a discrete.
Do some research into Axiom, Mirage, Paradigm, Klipsch, Polk, Koss, Cambridge Soundworks
What the different between digital coaxial and digital optical
Optical transmits audio information in the form of a beam of light, digital coax uses an electrical impulse. There are differences, and you'll hear arguements for and against both, but they are so close you won't tell the difference.
Make sure you have the same connection on your source and your receiver. If you have both, I prefer optical, but get a cable that's long enough to ensure there are no sharp turns in it. (Light doesn't make sharp turns)
Make sure you have the same connection on your source and your receiver. If you have both, I prefer optical, but get a cable that's long enough to ensure there are no sharp turns in it. (Light doesn't make sharp turns)
SPDIF
SPDIF:
A common use for the S/PDIF interface is to carry compressed digital audio as defined by the standard IEC 61937. This mode is used to connect the output of a DVD player to a home theater receiver that supports Dolby Digital or DTS surround sound. Another common use is to carry uncompressed digital audio from a CD player to a receiver. This specification also allows for the coupling of personal computer digital sound (if equipped) via optical or coax to Dolby or DTS capable receivers.
A common use for the S/PDIF interface is to carry compressed digital audio as defined by the standard IEC 61937. This mode is used to connect the output of a DVD player to a home theater receiver that supports Dolby Digital or DTS surround sound. Another common use is to carry uncompressed digital audio from a CD player to a receiver. This specification also allows for the coupling of personal computer digital sound (if equipped) via optical or coax to Dolby or DTS capable receivers.
1) RGB mean Red,Green and Blue.
2) HDMI mean High Defenition Media Interface
3) YPbPr mean Improvement fron RGB ( sent more colour signal to sharp picture)
Tuesday, 30 December 2008
Berjalan2 semasa cuti Chrismas 2008
Sewa kereta dari 24 dec sampai 30 dec di Enterprise dan kena bayar sebanyak £106.00.
Ini adalah sebahagian dari tempat2 yang mana saya singgah dlm beberapa hari itu.
Tempat singgahan pertama...
Birmighim stay satu malam kat rumah Azli..24 mlm 25 dec 2008.

Te mpat kedua Reading...lupa lak nak ambik gambar kat Uni dia...Ini anak Syukur berusia 3 bln...Tido semalam rumah dia 25 mlm 26 dec..
Pada pagi tu terus gi Oxford dan ambik gambar mana yg patut..
Salah satu gambar di dlm Oxford...
Rupanya Oxford Uni ni terdiri beberapa Collage dan dlm nya banyak gereja2 lama... yg sekarang dijadikan tempat belajar....semua collage didalam tu under naungan Uni Oxford.


Lepas tu bermalam kat rumah Mahadi pada 26 malam 27 dec.


Lepas tu gi Factory Outlet kat sekitar london gak.....Banyak barangan berjenama .....memang le dia buat potongan sebanyak 50 ~ 75 % tapi disebab barangannya mahal jadi selepas potongan pun masih beratus lagi....Contoh barangan yg ingat..Polo,Timberland,Vercase,Bose,Gucci,Royal Dultion,Guess,


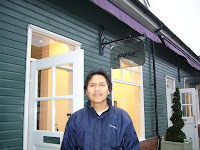
Lepas tu terus gi Manchester dan tidur kat rumah Muhalim..pada 27 mlm 28 dec......esoknya gi Factory Outlet...
 Boundry factory outlet...agak menarik juga barangan ini dan harga yg ditawarkan juga agak menarik....dapat le beli kasut Timberland kat sini RRP £80 jatuh sampai £30
Lepas tu gi menginap kat Travelodge bayar dlm £ 23.....28 mlm 29.......pkl 10 baru gi stoke on trent.....


Ini adalah sebahagian dari tempat2 yang mana saya singgah dlm beberapa hari itu.
Tempat singgahan pertama...
Birmighim stay satu malam kat rumah Azli..24 mlm 25 dec 2008.

Te
 mpat kedua Reading...lupa lak nak ambik gambar kat Uni dia...Ini anak Syukur berusia 3 bln...Tido semalam rumah dia 25 mlm 26 dec..
Pada pagi tu terus gi Oxford dan ambik gambar mana yg patut..
Salah satu gambar di dlm Oxford...
Rupanya Oxford Uni ni terdiri beberapa Collage dan dlm nya banyak gereja2 lama... yg sekarang dijadikan tempat belajar....semua collage didalam tu under naungan Uni Oxford.


Lepas tu bermalam kat rumah Mahadi pada 26 malam 27 dec.


Lepas tu gi Factory Outlet kat sekitar london gak.....Banyak barangan berjenama .....memang le dia buat potongan sebanyak 50 ~ 75 % tapi disebab barangannya mahal jadi selepas potongan pun masih beratus lagi....Contoh barangan yg ingat..Polo,Timberland,Vercase,Bose,Gucci,Royal Dultion,Guess,


Lepas tu terus gi Manchester dan tidur kat rumah Muhalim..pada 27 mlm 28 dec......esoknya gi Factory Outlet...
 Boundry factory outlet...agak menarik juga barangan ini dan harga yg ditawarkan juga agak menarik....dapat le beli kasut Timberland kat sini RRP £80 jatuh sampai £30
Lepas tu gi menginap kat Travelodge bayar dlm £ 23.....28 mlm 29.......pkl 10 baru gi stoke on trent.....


Friday, 19 December 2008
Basic Camera (BM)
Bahagian kamera yg wajib diketahui adalah:
1) Shutter Speed
2)Aperture
3)ISO
1) Shutter Speed
Shutter speed adalah Jangka masa pergerakkan iris kamera terbuka dan tertutup (On-Off)yang di kira 1/30,1/60,1/100 etc. Click here atau Click here.
2) Aperture
Aperture adalah bukaan iris kamera yang diukur dlm friction (f)..click here..
Dalam aperture ada Depth of Field (DOF). Click here.
Note : Apperture dan shutter speed mesti diselaraskan dgn betul.
3) ISO
ISO adalah keadaan dimana memperbetulkan penggunakan kadar cahaya.
1) Shutter Speed
2)Aperture
3)ISO
1) Shutter Speed
Shutter speed adalah Jangka masa pergerakkan iris kamera terbuka dan tertutup (On-Off)yang di kira 1/30,1/60,1/100 etc. Click here atau Click here.
- 1/30 (0.033 On-Off/sesaat ) adalah menunjukkan iris lambat tertutup
- 1/100 (0.01 On-Off/sesaat) adalah menunjukkan iris cepat tertutup.
2) Aperture
Aperture adalah bukaan iris kamera yang diukur dlm friction (f)..click here..
- f2.8 - bukaan iris adalah besar dan lebih cahaya akan masuk .
- f22 - bukaan iris adalah lebih kecil dan kurang cahaya akan masuk.
Dalam aperture ada Depth of Field (DOF). Click here.
- f2.8 akan menyebabkan cetek DOF (gambar depan terang dan belakang kabur)/(fast exposures atau cahaya yg banyak masuk dan menyebabkan gambar belakang terbakar/kabur)
- f22 akan menyebabkan luas/panjang DOF ( gambar akan terang depan dan belakang)/(slow exposures atau cahaya yg kurang masuk dan menyebabkan gambar belakang tidak terbakar/kabur)
Note : Apperture dan shutter speed mesti diselaraskan dgn betul.
- Apperture kecil tetapi slow shutter speed hanya akan menyebabkan cahaya akan banyak masuk disebabkan shutter speed yg lambat tertutup.
- Apperture besar tetapi fast shutter speed hanya akan menyebabkan cahaya akan sedikit masuk disebabkan shutter speed yg cepat tertutup.
- Terlalu banyak cahaya akan menyebabkan over exporsure
- Terlalu sikit cahaya akan menyebabkan under exporsure.
3) ISO
ISO adalah keadaan dimana memperbetulkan penggunakan kadar cahaya.
- ISO 100 = less sensitivity ( bagus utk cahaya matahari yg terang,tepi pantai,salji dll )
- ISO 200 = moderate ( sianghari dlm keadaan redup)
- ISO 400 = more sensitivity ( kadar cahaya yg kurang/suram spt dlm rumah/bilik )
Subscribe to:
Posts (Atom)


